How To Tell If Your Property Can Be Water Submetered
Articles


The question we need to answer:
If you are thinking about water submetering, the first big question is not “Which meter should I buy?” It is “Can my building even be submetered without major plumbing work?”
This guide is built to help you walk a residential property (anything from a duplex to a big apartment building) and answer one core question:
"Does each unit have its own cold water supply line that is not shared with any other unit?"
If yes, your building is likely a good candidate for submetering. If not, you may need plumbing changes or a different billing approach.
If you want a deeper overview of submetering before you dive in, you can keep this guide open alongside the Ultimate Guide to Water Submetering from SimpleSUB.
Ready to check your property now? Jump to the quick checklist
Table of Contents
Ground rule: what “eligible for submetering” really means
From a plumbing perspective, a unit is submeterable only if its water usage can be isolated on a single (or clearly grouped) pipe run.
Industry guidance on metering and submetering makes the same point in different ways: to meter individual units, each unit needs to function as its own plumbing system, not intertwined with others.
For this guide, we will use a strict definition:
A property is “eligible for submetering” only if each unit has its own water supply that is not shared with any other unit.
That is what you are trying to confirm as you walk the property.
Before you start: things to bring and what to look for

You don't need to be a plumber to do a first pass! You just need:
- A flashlight or headlamp
- A notepad or phone notes
- Access to the basement, mechanical rooms, garages, or crawlspaces
- Access to at least a few representative units
Now, let’s walk the property, from the biggest clues to the most subtle ones.
Step 1: Find the main water meter and where water enters the building
Start where the water comes in:
- Locate the city or master meter and main shutoff.
- Follow the large incoming line into the building.
You aren't trying to map everything yet. You just want to see how the main splits.
Ask yourself:
- Does the main line break into a few large branches that clearly head toward unit stacks or wings?
- Or does it disappear into walls with no obvious separation?
Many modern multifamily designs intentionally split water lines so each unit or stack can be independently metered. That is what you are hoping to see.
For more background on metering layouts in multifamily housing, the Multi-Family Water Metering guide from the Building America Solution Center is a good reference.
Step 2: Look for unit-level shutoff valves
Next, you are looking for shutoff valves that control water for individual units.
Common places to check:
- Basement corridors or utility rooms
- Parking garages or storage areas
- Mechanical rooms on each floor
- Hallway closets or dedicated “meter rooms”
What you want to find:
- A row of valves (often ball valves), each one labeled with unit numbers like “101, 102, 103,” etc.
- In some newer buildings, you might see manifolds or small meter panels with multiple takeoffs grouped by unit.
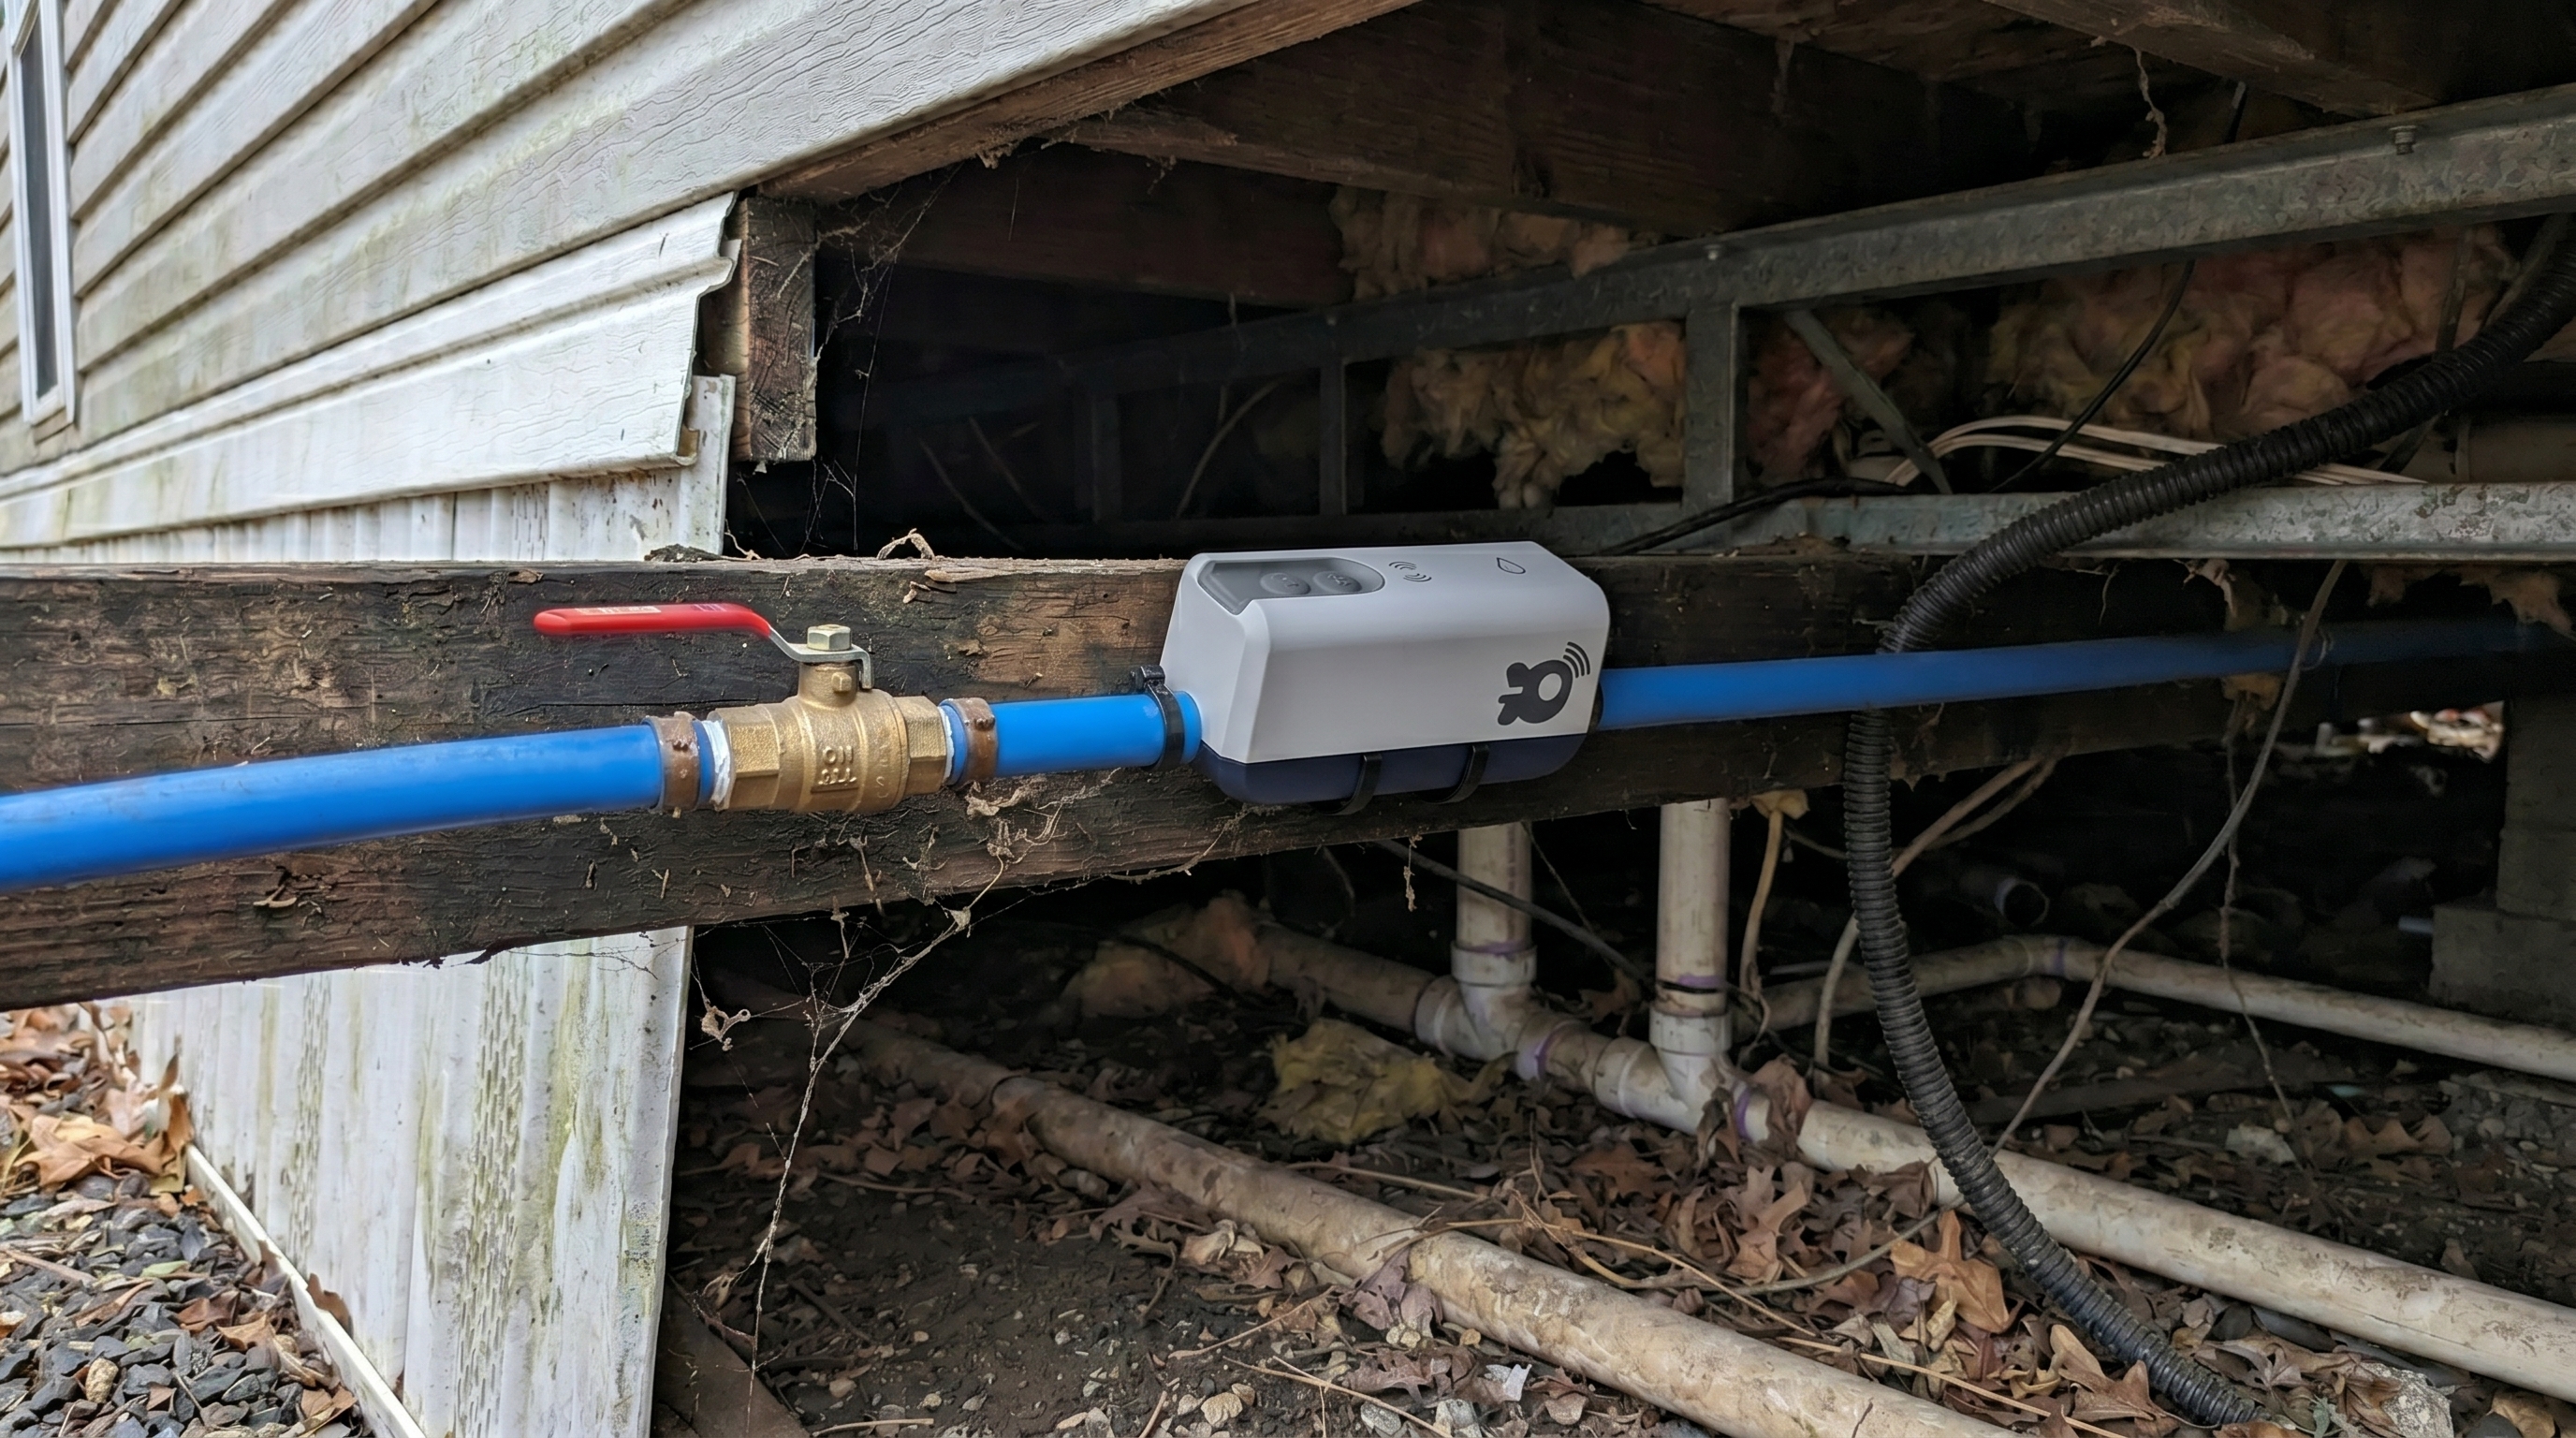
If you can close one valve and it clearly shuts off water to a single unit, that is a very strong sign that unit has its own supply line and can be submetered.
If the valves are labeled by floor or “stack” instead of by unit, that usually means multiple units share that line, which is a potential red flag.
Step 3: Trace the cold water lines to see if they are unique per unit
Now you are going to play “follow the pipe.”
From each suspected unit valve or branch:
- Follow the pipe as far as you can see it in the basement, ceiling, or mechanical space.
- Note where it splits.
- Watch for tees that clearly head into different units.
You are trying to answer:
- Does this single line only feed one unit?
- Or does it branch off to serve two or more units?
Shared supply lines between units make it impossible to track usage accurately for that one unit. To bill fairly, the line feeding each meter needs to feed only that unit.
Signs that plumbing is probably not separated:
- A single riser that goes up through several floors and visibly branches into multiple apartments.
- A line labeled “Stack 1” that appears to serve three or four units vertically.
- A bathroom wall that serves “back to back” units where both sets of fixtures tie into the same supply branches.
In those cases, a plumber would need to reconfigure the piping to create truly unit-specific runs before you could fairly submeter.
If you want a more technical look at how branch lines and point-of-use metering is usually set up, the ASPE plumbing design standards on submetering and branch systems are a helpful (but more engineering heavy) reference. You can find them through the American Society of Plumbing Engineers or the AWWA M36 Water Audits and Loss Control Programs manual.
Step 4: Check water heaters and what they tell you
You already have one of the best shortcuts: individual water heaters.
When a unit has its own water heater (tank or tankless) inside the unit or in a dedicated closet:
- The cold line feeding that heater usually serves only that unit.
- The hot water side inside that unit is already isolated.
That is a good sign the plumbing was designed per unit and is likely submeterable with minimal changes. Studies and field experience across HUD and multifamily operators show that individual unit systems make both metering and billing much more straightforward.
What to look for:
- One water heater per unit, located inside the unit or immediately adjacent.
- Clear labeling on any remote water heater bank showing which heater serves which unit.
Be careful with this shortcut, though:
- A central water heater that serves many units usually means the hot water side is shared. You might still be able to meter each unit’s cold water intake, but you will not be able to separately meter hot water without more complex plumbing.
- In some older buildings, a single water heater might serve two “mirror” units, which is another sign of shared plumbing.
Step 5: Walk inside a few units and look for hints
Even if you cannot see every pipe in the walls, the fixtures inside units can give you helpful clues.
In each unit you enter:
- Look under kitchen and bathroom sinks for shutoff valves.
- Note whether each fixture has its own shutoff or if multiple fixtures seem to share lines that disappear into a common wall.
- Check mechanical closets, laundry rooms, and utility spaces for manifolds or additional shutoffs.
You are not likely to fully prove separation from inside the units alone, but you can spot strange situations, like:
- A shared utility closet in the hallway that obviously contains plumbing for multiple units.
- Laundry rooms that appear to pull water from another unit’s utility chase.
If you want to see how interior fixture layouts tie into broader metering strategy, SimpleSUB’s How to Install a Water Submeter has diagrams that help you visualize typical install points on branch lines and risers.
For smaller properties like duplexes, triplexes, and quadplexes, you might also find it helpful to review Water Submetering for Duplexes, Triplexes, and Quadplexes.
Step 6: Find and separate common area water
Even if each unit has a clean supply line, common area water can cause trouble if it is tied to one of those lines.
Look for:
- Irrigation and landscaping lines
- Shared laundry rooms
- Pool or spa fill lines
- Clubhouse or lobby bathrooms
- Exterior hose bibs
You want these to be on:
- Their own dedicated common area line, or
- A separate meter, or
- At least clearly split off near the main so you can meter that common usage separately.
Water conservation programs and submetering fact sheets consistently recommend separating common area usage if you want fair and defensible resident billing. Resources like AWWA M36 Water Audits and Loss Control Programs provide more context on how utilities and large properties separate and track these loads.
If a hose bib or irrigation system is tied into a single unit’s line, that unit’s meter will over report their “usage” and billing becomes messy. You will want a plumber to move those common fixtures onto a separate common line before you roll out submeters.
Quick on-site checklist: from easiest clues to hardest

Here is a condensed checklist you can literally carry around on your phone. Start at the top and work your way down.
Most obvious clues
- Labeled unit shutoffs:
- I see one shutoff valve per unit, clearly labeled.
- Turning one valve off affects only one unit.
- Individual water heaters:
- Each unit has its own water heater, or
- A water heater bank where each heater is clearly labeled for a single unit.
- Clean branches from the main:
- After the main meter, I see distinct branches that follow logical paths to unit stacks or wings.
- Each branch appears to serve only one unit, or one clearly defined unit stack that can be further separated.
Secondary clues
- Meter or manifold panels:
- There are small panels or manifolds grouped by unit in the basement, garage, or mechanical spaces.
- These have obvious access where a meter could be installed on the cold line before it splits.
- Common area separation:
- Irrigation, pools, shared laundry, and exterior hose bibs have their own branches that are not tied into any specific unit line.
- There is a clear place to install a common area meter or the line is already separately metered.
More subtle clues (or red flags)
- Shared risers:
- One vertical pipe feeds several units on different floors, with branches into each apartment. This is a red flag.
- The only labels are “north stack” or “south stack” instead of unit numbers.
- Shared back-to-back plumbing walls:
- A single set of lines appears to serve bathrooms or kitchens for two units that share a wall.
- Turning off one valve affects fixtures in more than one unit.
- No access to piping:
- Pipes disappear into sealed chases or ceilings with no access panels.
- You cannot identify any clear unit specific supply runs.
If your notes include many items from the “most obvious clues” section and very few red flags, your building is probably in good shape for submetering.
If the red flags show up repeatedly, you likely need a licensed plumber or submetering specialist to design a re-pipe or advise on whether submetering is realistic at all. In some situations, fair billing might require a different approach, such as a ratio utility billing system, which allocates costs based on unit size or occupancy rather than exact metered usage.
What to do with your findings
Once you have walked the property and filled out your notes:
- Mark each unit as either:
- “Clearly has its own water supply line,”
- “Probably shared,” or
- “Unknown, needs plumber to confirm.”
- Count the “clearly has its own line” units. Those are your initial candidates for submetering.
- Flag problem areas where shared risers, common area tie ins, or impossible access might require rework.
From here, you can talk with a submetering provider about specific meter locations, install methods, and costs. If you want a practical planning guide that builds on this walkthrough, SimpleSUB’s Step-by-Step Checklist for Implementing a Water Submetering System is a good next stop, along with the full library of Water Submetering Guides, Tools, and Case Studies.
Final reminder
This walkthrough is intentionally strict. For the purpose of deciding whether a property is truly eligible for water submetering, keep this rule front and center:
Only count a unit as eligible if it has its own cold water supply that is not shared with any other unit.
If you are unsure about particular lines or stacks, assume they are shared until a plumber or submetering specialist can confirm otherwise. That conservative approach keeps your future billing fair, your install simpler, and your residents’ trust intact.
Disclaimer: SimpleSUB’s water submetering and billing features may not be permitted in all states or local jurisdictions. You are solely responsible for ensuring that your use of any billing or cost-recovery tools complies with all applicable laws and regulations in your area. Nothing on this page (or elsewhere on our site) should be considered legal advice. You should consult your own legal counsel before implementing any billing practices.
Request a Demo
We’ll design an affordable, easy-to-install solution for your submetering project, large or small.
Read Related Articles

Ultimate Guide

Articles
Articles

