How to Start Submetering Water in Your Mobile Home Park
How Tos


Why you should move from “water included” to submetered billing in a mobile home park
When water is included in rent, high use and hidden leaks are common. A few heavy users can drive up the bill for everyone. Submetering fixes this. Each home pays for what it uses. You catch leaks fast. Cash flow becomes predictable.
Mobile home parks are a great fit for clamp on, cellular submeters. Install is quick. No cutting. No shutoffs. A simple cloud dashboard handles reads, alerts, and exports. For a deeper primer, see the Ultimate Guide to Water Submetering for Mobile Home Parks.
Goal for this guide: a practical, resident friendly plan that takes you from “water included” to fair, submetered billing with minimal friction. If you'd like, we also have a more in-depth guide to implementing a water submetering system here.
Step 1: Plan and prepare for your park

A short planning sprint makes the whole transition smooth.
Map your system
- Sketch a site map with lot numbers.
- Mark the main lines and service lines.
- Note pipe material and approximate sizes where visible.
- Identify a straight, accessible section of pipe near each home’s shutoff. Clamp on meters need a clean, straight run.
If a few lots have poor access, keep moving. You can start with the rest and circle back later.
Run the numbers
Use conservative assumptions. Keep it simple.
- Average monthly water bill. Use a 3 month average.
- Expected reduction from accountability and leak alerts. Many parks see 10 to 25 percent. Use 10 percent to be conservative.
- Hardware and install. Clamp on cellular meters typically lower install labor since there is no cutting or shutoff.
- Billing recovery. Decide what share of usage you will bill back. Policies vary by state and city.
Example: Your park pays $7,500 per month. A 10 percent reduction saves $300 per home all in, the project is $24,000. Savings alone would recover that in about 32 months. If you bill residents for usage, payback is faster. Results vary by rates and local rules.
For real world results, read this park that saved $35k.
Decide your transition principles
Write these down and share them with your team.
- Transparency. Residents see reads and know the start date.
- Fairness. Start with information only bills before charging.
- Protection. Add caps or credits for the first billed month.
- Support. Clear channels for questions.
- Compliance. Check local notice and billing rules. Requirements vary by locale.
Step 2: Choose your system and partner
Not all systems are equal. The option you choose sets your timeline and risk.
Why SimpleSUB fits mobile home parks
- Clamp on install with no cutting and no shutoffs. Protects older service lines.
- Native cellular connectivity. No Wi-Fi or onsite gateways to manage.
- Simple cloud dashboard for alerts, daily reads, and billing exports. See the solution overview.
- Quick ROI. Accountability plus leak alerts reduce waste.
- Proven in parks. See Weber Properties and an Oklahoma community.
Step 3: Design a resident friendly transition plan (timeline, notices, sample bills, protections for residents)
Your plan should show residents what will happen and when. Use a two phase approach.
A. Timeline template
- Week 1. Announce the program and share the why.
- Week 2 to 3. Install meters and map lots in the dashboard.
- First full cycle. Send information only bills with usage and cost, zero due.
- Second cycle. Begin charging with protections.
- Ongoing. Monitor for leaks, answer questions, refine policies.
B. Notices and talking points
Send a one page letter and post it in common areas.
- Why the change. Fairness and conservation. Each home pays for what it uses.
- What is new. Meters read daily. Bills show exact usage.
- When it starts. Clear dates for installs, first info bill, and first charge.
- How to get help. Phone, email, or office hours.
- Link to a plain language FAQ. You can base it on the Ultimate Guide.
C. Sample bills
Attach a sample line item with real numbers from your rates. Show usage in gallons and the per unit charge. Include taxes or fees if applicable in your area. This reduces surprise.
D. Protections for residents
Choose one or two for the first billed month.
- First month cap. Charge the lower of actual or a set cap.
- Credit. Apply a flat dollar credit for the first bill.
- Grace policy. Allow payment plans for unusual first month spikes.
- Leak forgiveness. If a resident fixes a verified fixture leak within a set window, credit part of the excess.
Make these time bound and clear.
Step 4: Roll it out in your park
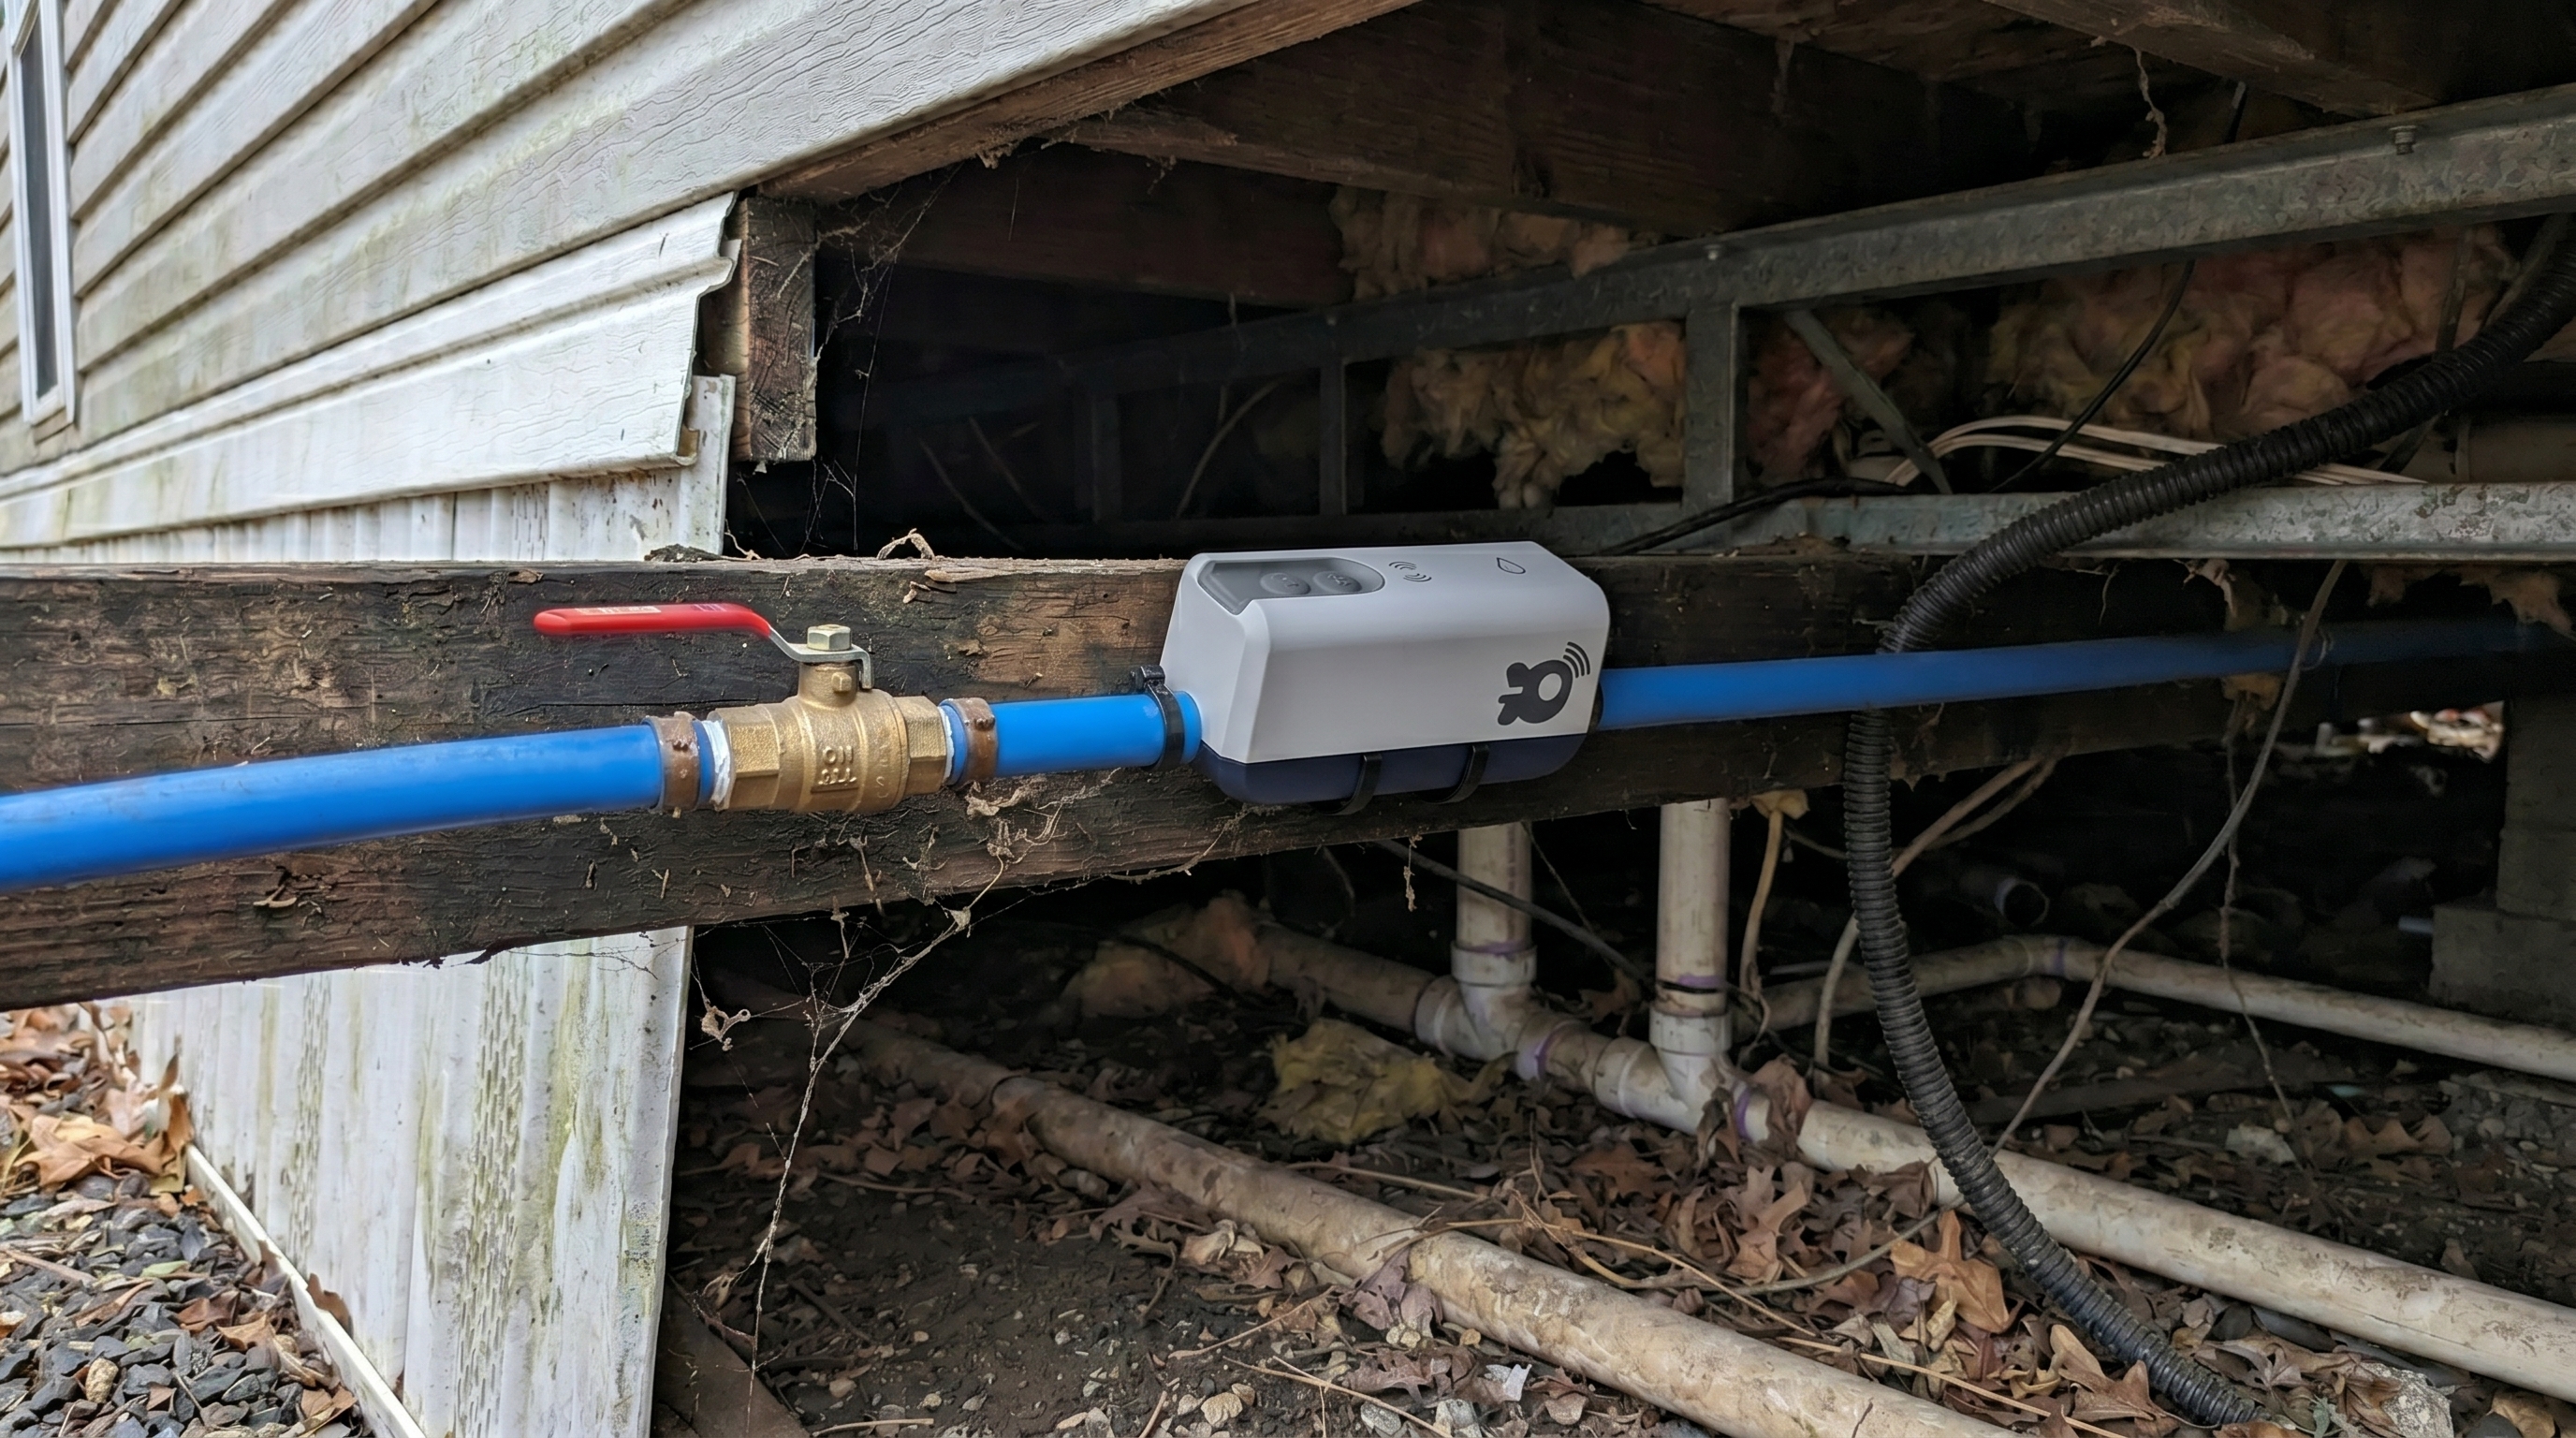
You can go live in days with clamp-on cellular hardware.
A. Install and map
- Confirm a straight pipe section at each home.
- Clean and clamp the meter per instructions.
- Power on. Each device connects over cellular.
- Verify a live read in the dashboard.
- Map the device to the lot number and resident name.
No water shutoffs are needed with clamp-on water submeters. This avoids disruption and schedule juggling.
B. Information only month
Send bills that show usage and the cost that would be charged, but with zero due. Add conservation tips and a reminder about the first charge date. Encourage residents to check for running toilets. Quiet overnight flow often points to a leak.
C. Begin charging
On the second full cycle:
- Export usage by lot from the SimpleSUB dashboard.
- Apply caps or credits you promised.
- Add shared area meters for irrigation or laundry so residents are not billed for common use.
- Keep your FAQ updated with any common questions.
Tip: If a few homes are not meterable yet, use a temporary ratio utility billing for those only. Meter the rest now, then finish later.
Step 5: Keep it running smoothly (monitor usage and leaks, handle questions, refine policies as needed)
Small habits lock in savings.
Weekly quick check
- Open the dashboard and sort by continuous flow to catch likely leaks.
- Message any residents with unusual overnight usage.
- Review any offline devices. Most blips resolve on their own.
Monthly tasks
- Export reads for billing on your cycle date.
- Walk a few meter locations during routine rounds. Confirm clamps are snug and clear of vegetation.
- Audit the top 10 users for trends.
Maintenance and batteries
Clamp on cellular meters are low touch. Replace batteries only when flagged. Typical life is several years depending on settings and signal strength. Re seat a shifted clamp and re verify reads if needed.
Policy tune ups

After two or three cycles, review:
- Are caps or credits still needed?
- Do you need a standard leak forgiveness policy?
- Any recurring questions to add to the FAQ?
See how ongoing monitoring paid off in these stories from a park that saved $35k and Weber Properties.
Quick reference: transition options and tradeoffs
FAQs
Do I need to shut off water to install?
No for clamp on systems. Inline systems usually require shutoffs.
What if local rules limit billing changes?
Policies vary by city and state. Build in extra notice and a grace period if required. Check your local requirements before you start.
How do I handle disputes?
Show daily usage graphs and the information only bill. Compare to park averages. Offer a short test period if needed.
Disclaimer: SimpleSUB’s water submetering and billing features may not be permitted in all states or local jurisdictions. You are solely responsible for ensuring that your use of any billing or cost-recovery tools complies with all applicable laws and regulations in your area. Nothing on this page (or elsewhere on our site) should be considered legal advice. You should consult your own legal counsel before implementing any billing practices.
Request a Demo
We’ll design an affordable, easy-to-install solution for your submetering project, large or small.
Read Related Articles

Ultimate Guide

Articles
Articles

